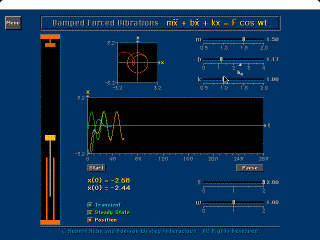
However, the program was not written to standard Macintosh interface specifications, and so printing requires the use of screen dumps. If you are not careful in this, you can waste a lot of paper and laser printer toner - below are some directions to help avoid wasted time and resources.
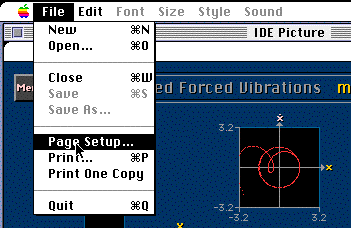
The first thing to do in making a screen dump is while holding down the command and shift keys, to then press the 3 key. This creates a file named Picture 1 (or a later number) on the startup disk of your Macintosh. (The command key is also know as the apple key and is located just to the left of the spacebar.)
When you then doubleclick on this file named Picture 1, you will be opening it in Simple Text, and be almost ready to print it. But first you need to select Page Setup from the File Menu.
Selecting this menu entry produces the dialog box below to the left. There are several changes you wish to make in the left hand picture below as illustrated in the picture below to the right:

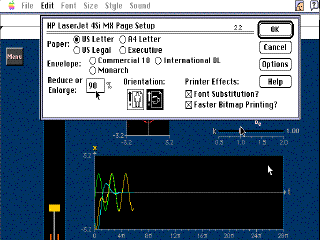
The changes above are:
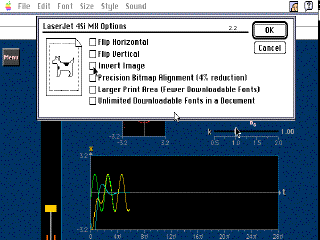
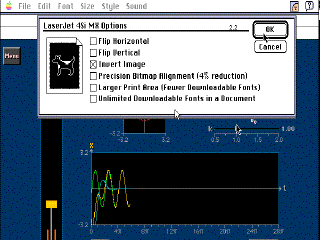
There is one vital change you wish to make in the left hand picture above as illustrated in the picture above to the right; namely click on the Invert Image tab.
Now you can press OK several times, and select Print from the File Menu.
But before pressing the final Print button, add a 1 to the To: field of the page range as illustrated in the picture below to the right. On a 17 inch monitor, you may waste 3 sheets of paper otherwise!

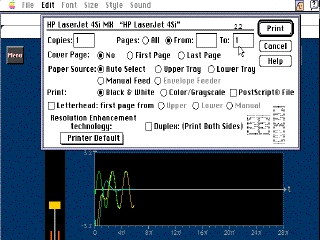
Sometimes it may be useful to select the Color/Grayscale tab as well as illustrated below. However results often seem to be better (and certainly are faster) with the default Black and White mode.
Last Update: April 27, 1999